Environment Mapping using Cubemaps
This post will describe how I completed the second assignment of CENG 469 Computer Graphics 2 course. In this assignment, I created an OpenGL application capable of rendering reflections, which is accomplished with environment mapping using cubemaps.
Skybox
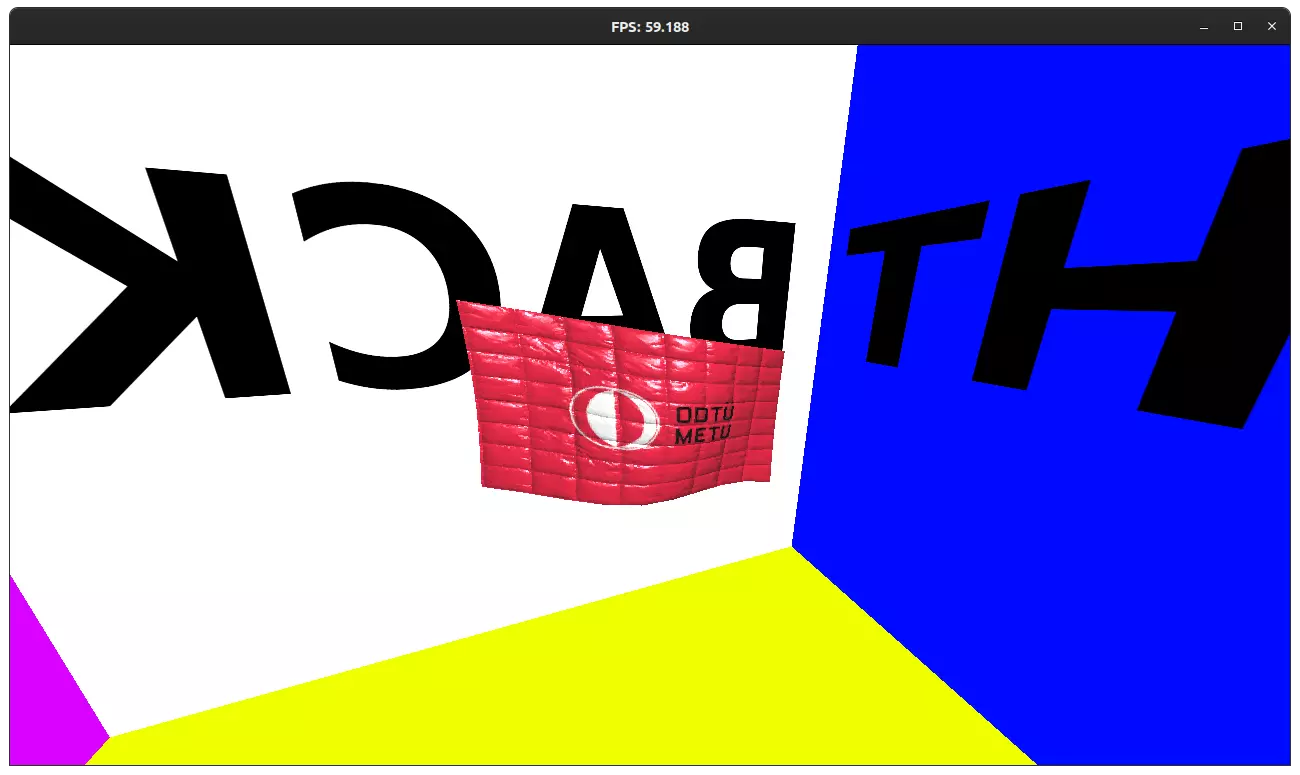
I used the code I wrote from the previous assignment as a template to get started. I started by adding a skybox to the scene. In the first assignment, I faked the sky by creating a flat plane behind the flag that covers the screen. Since the camera didn’t move, this solution was enough back then.
- The position of the camera should not affect the skybox.
- We can zero the 4th row and column of the view matrix to remove the translation in skybox’s vertex shader.
- Alternatively, we can just zero the 4th component of each vertex before applying the view matrix, which cancels the translation, and make it 1 again before the projection matrix. This is the approach I used.
- GLSL provides
samplerCubetype, which can be used in the fragment shader after binding and creating aGL_TEXTURE_CUBE_MAPas explained in the slides or LearnOpenGL site.
Thanks to our course staff, we have been provided with sample assets to use for the skybox. I used the test textures to confirm that each face is correctly positioned. Here’s the flag from the previous homework with the skybox:
Camera Movement
I also started implementing basic movement controls during this step. I made use of this resource given in the homework text. Later, I developed this further, by implementing velocity and acceleration to provide smoother movement. The input from the keyboard is turned into a vector that represents the acceleration, which is then normalized to maintain constant acceleration when multiple keys are pressed.
The input is taken as a vector in the coordinate space of the camera, and converted into world space as follows:
\[\begin{bmatrix} R & U & F \end{bmatrix} \times \begin{bmatrix} x \\ y \\ z \end{bmatrix}\]where \(R, U, F\) are the right, up and front vectors of the camera respectively, which are used to in their column form to create a 3x3 matrix. The vector on the right is normalized input vector.
I used semi-implicit Euler as the integration method for the camera movement:
velocity += acceleration * delta_time;
position += velocity * delta_time;
When no key is pressed, the camera moves in opposition to its velocity, thereby slowing down and eventually stopping. I adjusted the acceleration and deacceleration values so that the movement is both smooth and snappy.
Parsing Models
I adopted the .obj parser featured in the sample OpenGL program given to us.
Although I based the previous homework on this sample code, I had removed it since it wasn’t required for the previous assignment.
As a result, I added the parser back.
Moreover, I refactored the code to be more organized with classes.
Because the original parser could only parse a single object since it used global variables.
Then, I replaced the custom struct definitions used by the parser with the alternatives presented in glm library.
I also encapsulated the relevant OpenGL methods in the new model class.
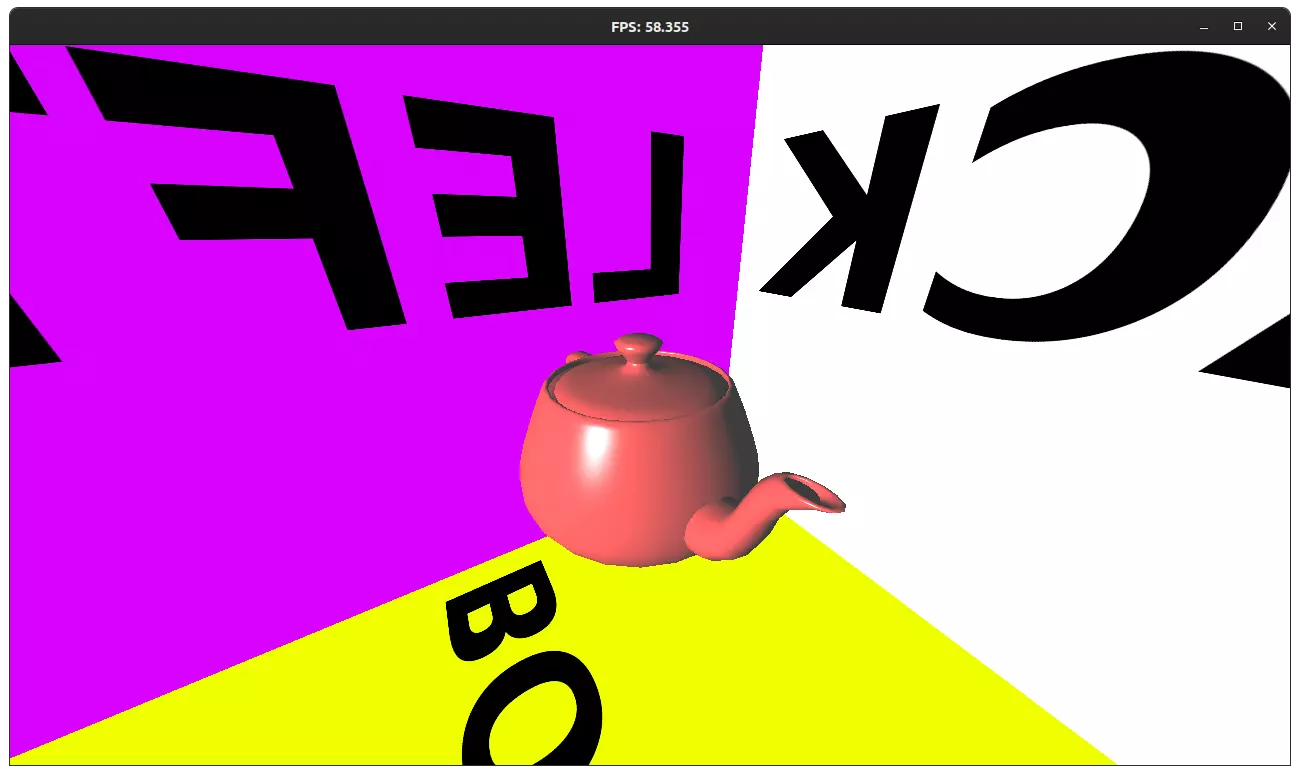
I used my new .obj parser to add the Utah teapot model into the scene:
Reflection Shader
Implementing reflections was surprisingly easy.
I already knew how to access the skybox as a samplerCube in GLSL fragment shader.
Using this for reflections was just a matter of figuring out the incoming ray, reflecting it about the normal, and sampling from the cubemap with the reflected ray.
Thanks to the built-in reflect function of GLSL, implementation is quite simple:
vec3 I = normalize(vec3(frag_world_position) - camera_position);
vec3 N = normalize(frag_normal);

vec3 reflection = reflect(I, N);

fragColor = texture(cubemap, reflection);
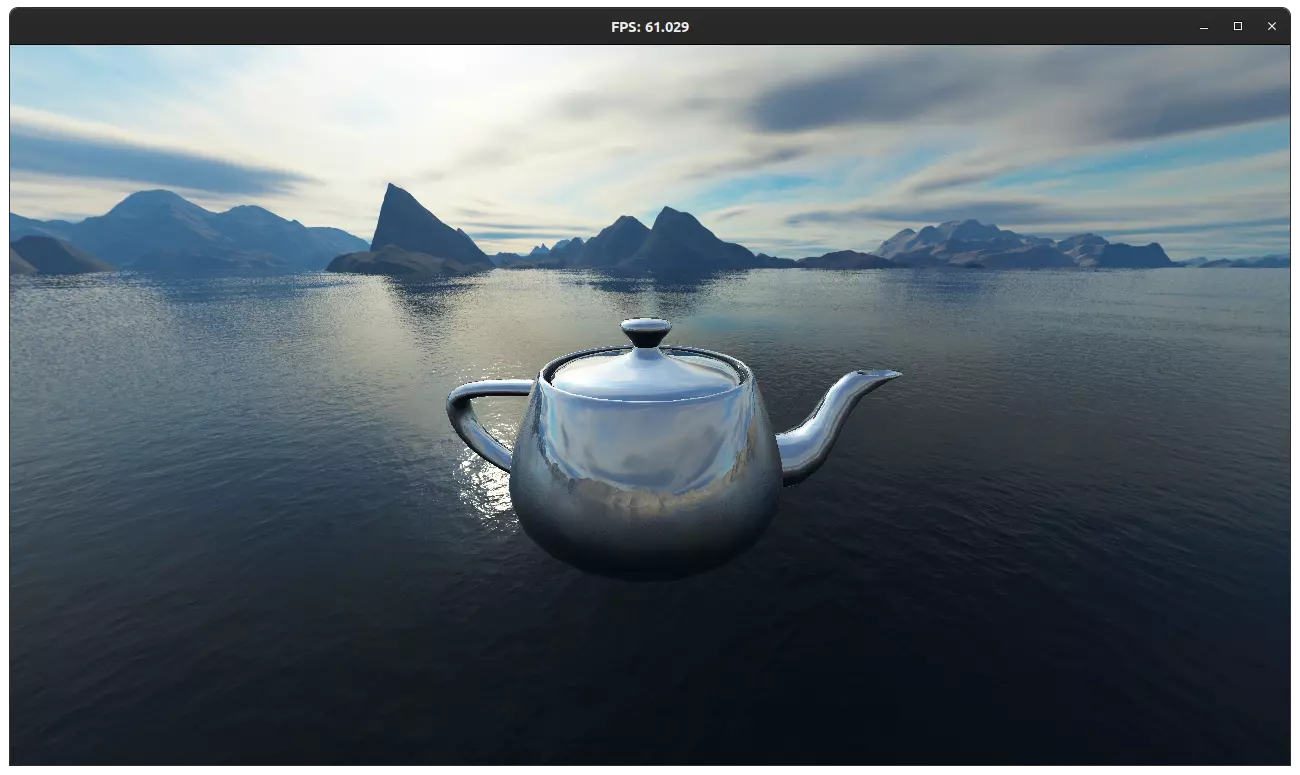
However, since we are currently using the skybox for reflections, other objects in the scene cannot be seen as reflections. To test this, I rendered another teapot with diffuse shader:
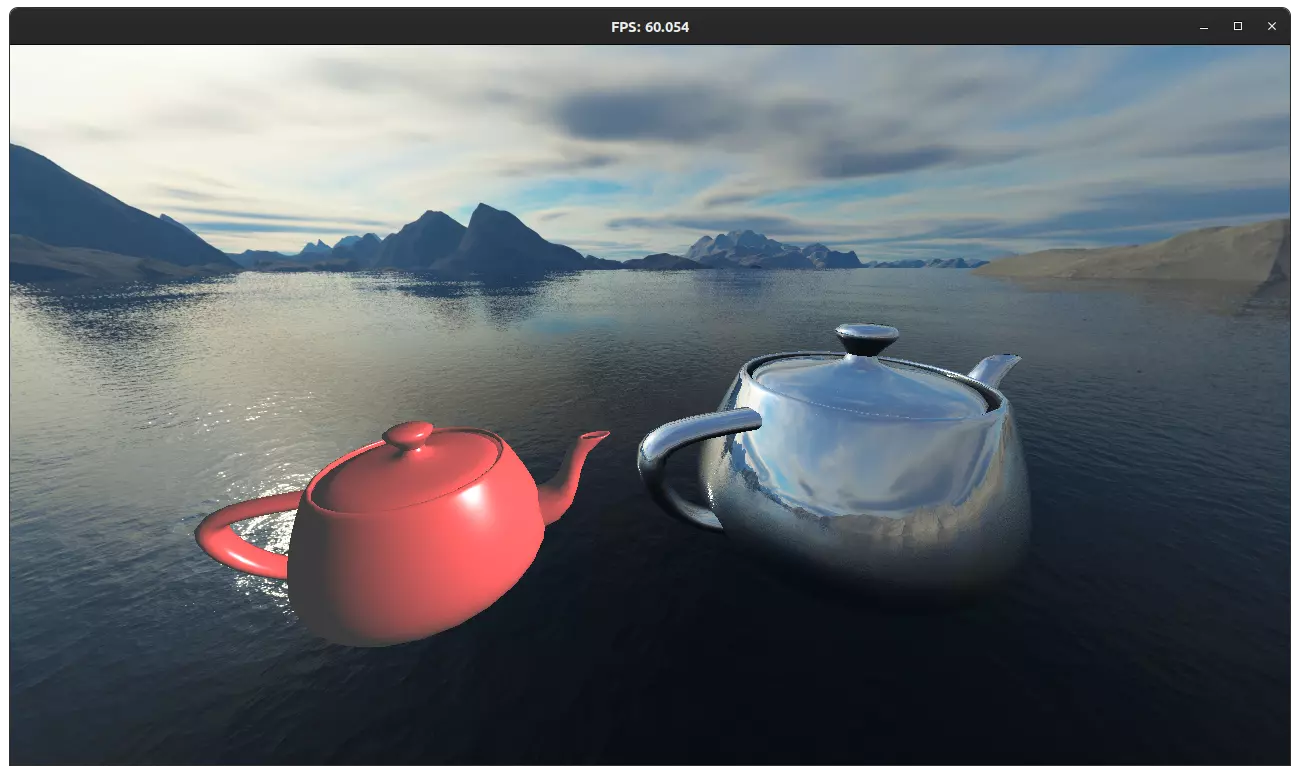
As you can see the image, the reflection of the second teapot is not visible as a reflection on the first teapot. To solve this problem, we need to use dynamic environment mapping.
Dynamic Environment Mapping
We can dynamically create a cubemap at runtime by rendering for all 6 directions (positive and negative for x, y, z) and saving the results to a cubemap texture. Then, we can use this newly created cubemap in the teapot shader to render the reflections of other objects. This is a costly operation since we need to render the scene 6 times for each cubemap we create. Fortunately, we are only required to render one dynamic cubemap in this project, and there are not many objects in the scene.
Creating an empty cubemap texture for rendering is similar to reading it from the disk.
The main difference is we pass nullptr to glTexImage2D call instead of actual image data.
After that, we need to create a framebuffer for offscreen rendering.
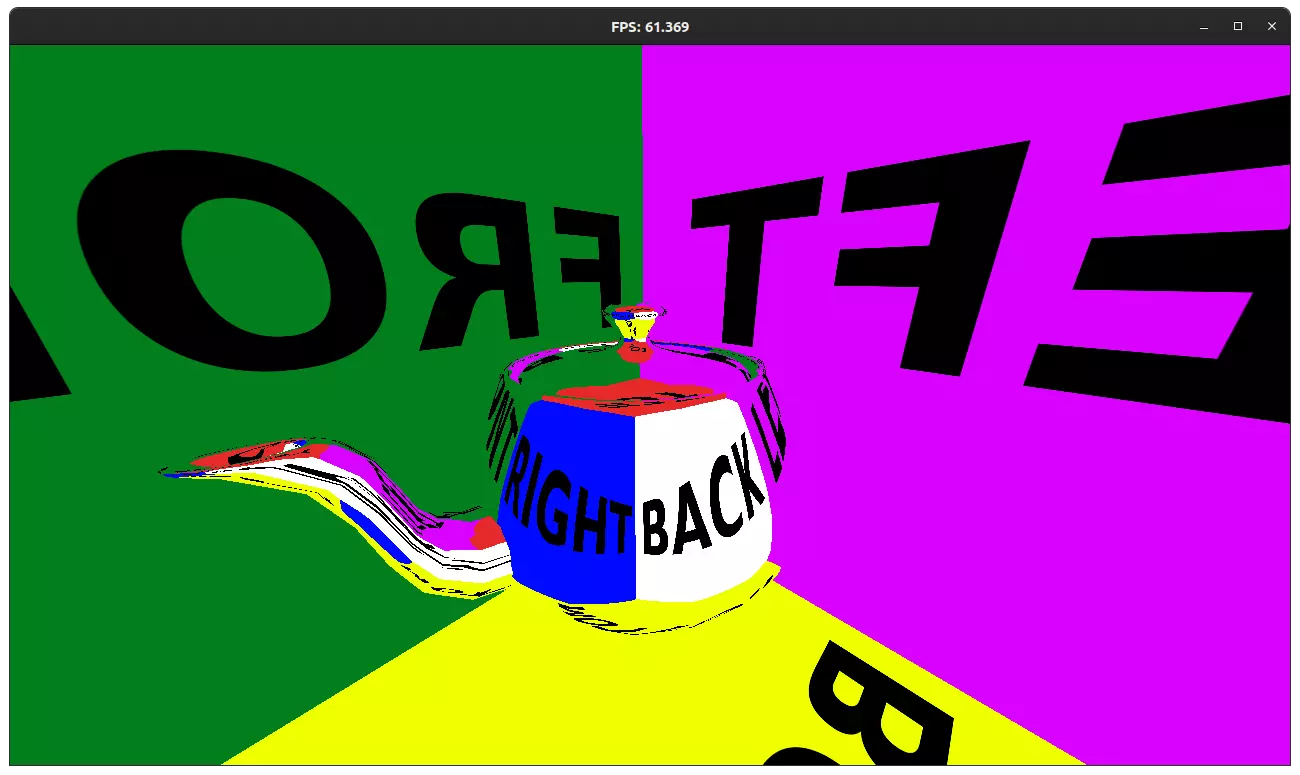
When I first implemented this, I got wildly incorrect results:
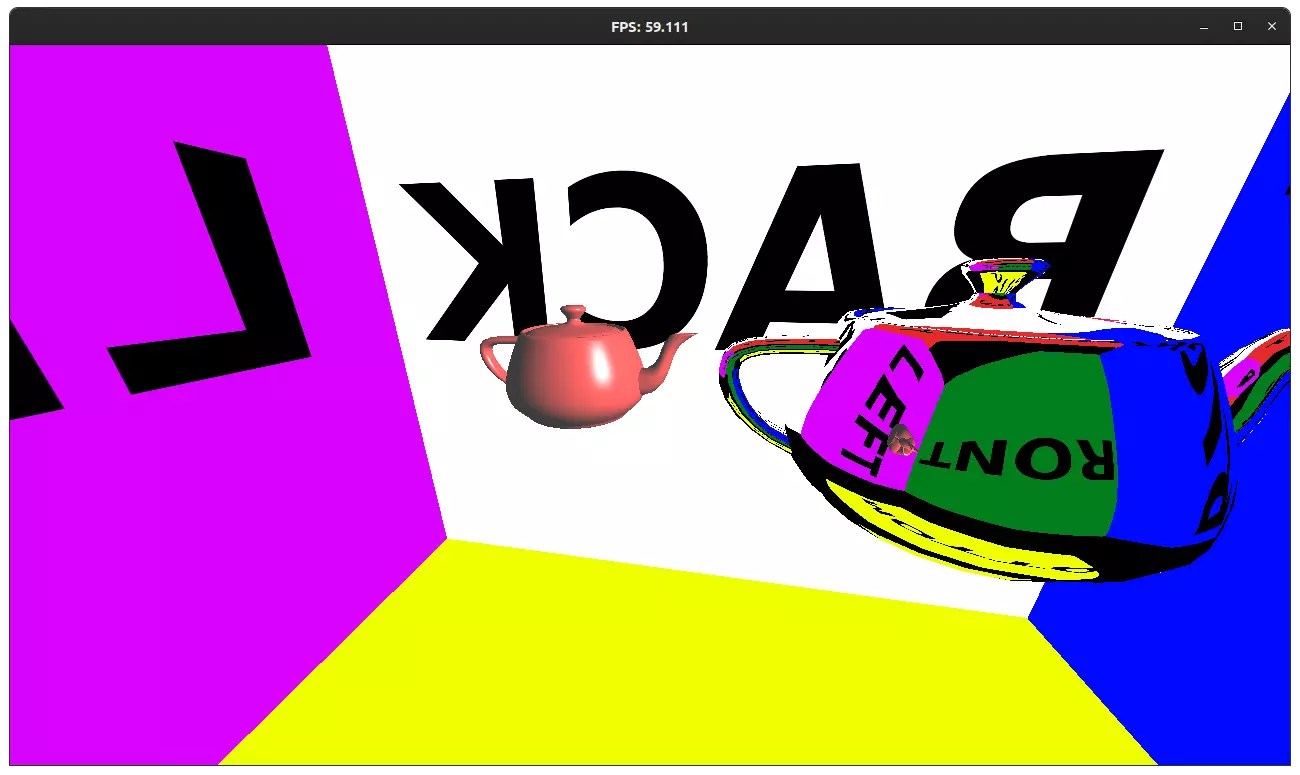
To clearly see what’s wrong, I replaced the normal skybox with the dynamically rendered environment map:
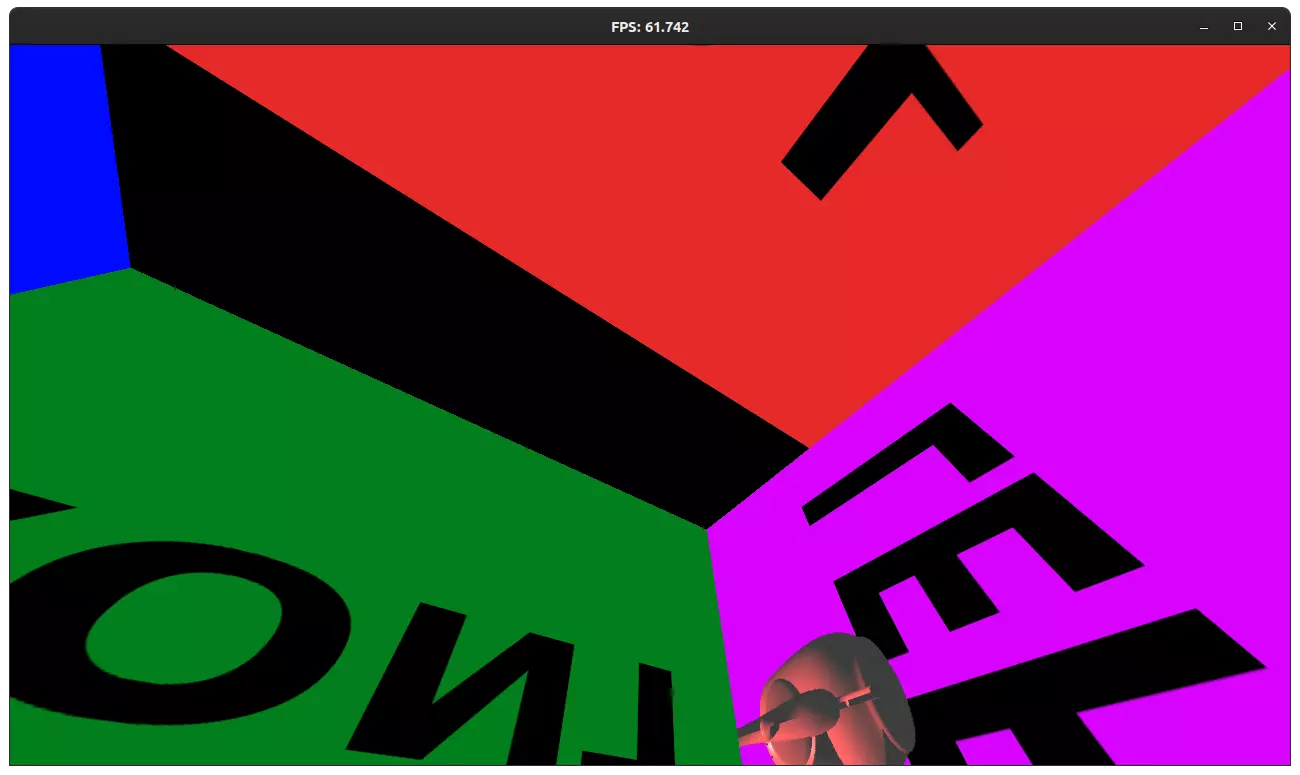
It turns out that there were several pitfalls I initially missed here:
- The up vector of the camera is not aligned correctly for some faces of the cube.
- Unfortunately, I couldn’t find any documentation about this. Hence, I manually adjusted the up vectors via trial and error.
- Although I adjusted the projection matrix correctly, I forgot to call
glViewport(0, 0, width, height)for cubemap rendering. Consequently, the render doesn’t fill the whole face, resulting in black bars. - Framebuffer needs a texture or renderbuffer for storing depth information. That’s why the depth checks fail for the teapot.
- Since we will not sample from the depth buffer, we can use a renderbuffer for that instead of a texture.
After fixing these issues, the program can correctly render the environment map, and it can be used in the shaders:
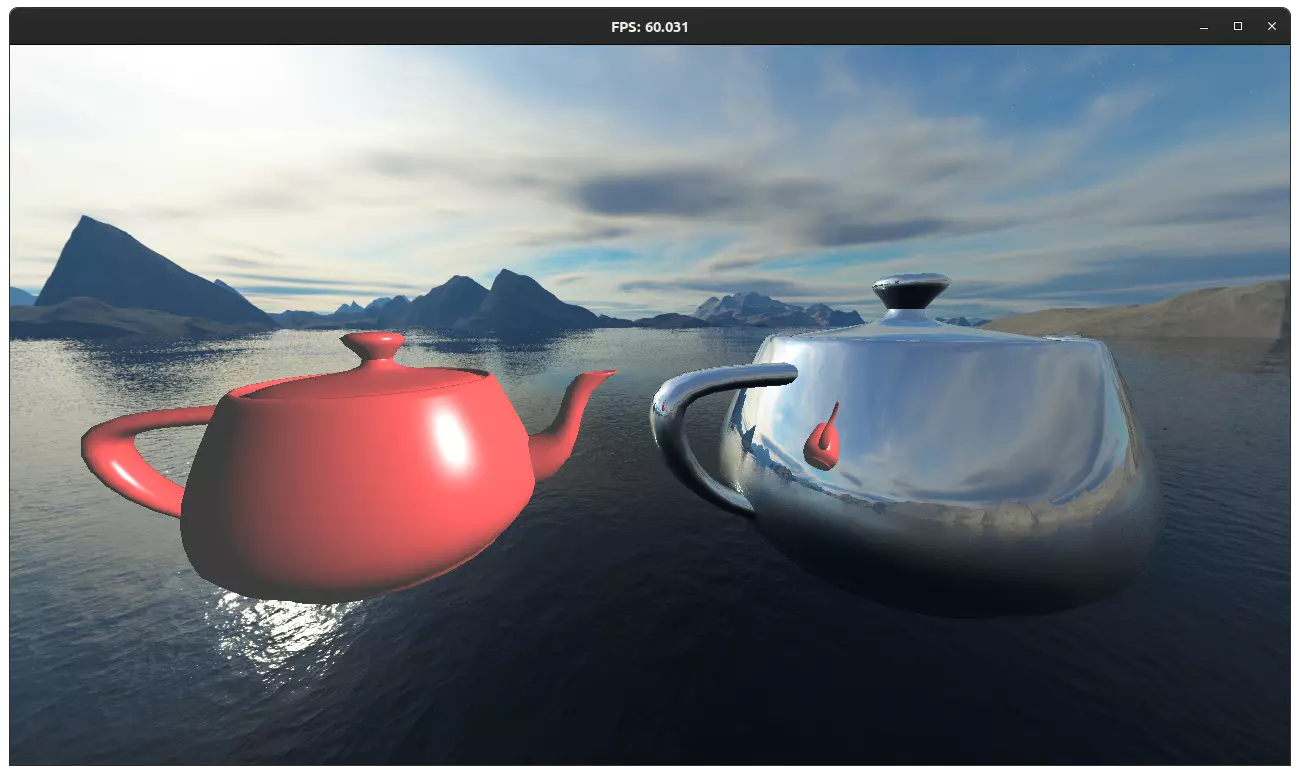
Although there are many resources on offscreen rendering, the information about rendering to a cubemap texture is quite scarce. Consequently, here’s a code snippet for rendering to a cubemap for reference:
glBindFramebuffer(GL_FRAMEBUFFER, framebuffer_id);
glBindTexture(GL_TEXTURE_CUBE_MAP, texture_id);
glFramebufferTexture2D(GL_FRAMEBUFFER, GL_COLOR_ATTACHMENT0, GL_TEXTURE_CUBE_MAP_POSITIVE_X + offset, texture_id, 0);
glFramebufferRenderbuffer(GL_FRAMEBUFFER, GL_DEPTH_STENCIL_ATTACHMENT, GL_RENDERBUFFER, renderbuffer_id);
Limitations of Cubemap Reflections
In the last picture, there’s one minor detail that bugs me: Since the origin of this teapot model is at its bottom, the reflections seem a little bit off. Furthermore, since the teapot doesn’t reflect itself, the handle part of the teapot looks weird. The first problem can easily be solved by adjusting the origin of the model. Self-reflection is not easy though. I think we can implement that by dividing the mesh into multiple meshes (e.g. the base, the handle, etc.) and reflecting between these meshes (each part has its own environment map).
Besides, since the environment map is created by placing cameras at the center of mesh, weird effects can be observed with some shapes. For example, here’s a reflection with a cube:
Note that as the camera moves, the reflection of the diffuse object stays the same. Its reflection seems like a distant, large shape instead of a small cube near the mirror cube. Although I’m not 100% sure, I think we need to move the cubemap camera depending on the location of the actual camera in order to solve this problem. Since this is against the specifications of the assignment, I didn’t attempt this solution.
On the other hand, reflections on a sphere look great:
Improving OBJ Parser
I noticed that the .obj parser was unable to read models exported from Blender.
Because it requires the vertex, normal, and texture indices of a triangle to be the same at a given corner.
I improved the parser so that it can parse and process .obj files which don’t satisfy the aforementioned requirement.
I created an UV sphere in Blender, exported it as .obj, and loaded into my program in order to get the result above.
Multiple Mirrors
I refactored the object system and added support for multiple mirror objects. Implementation was easier than I initially thought. Here’s a (psuedo)code snippet:
for (MirrorObj* mirror : mirrors)
	mirror->envmap_ready = false;
// Object will fallback to sky texture if environment map is not ready

// Create environment maps for each mirror object
for (MirrorObj* mirror : mirrors) {
	// Hide this object in its own environment map
	mirror->visible = false;
	mirror->envmap.prepare_render();
	for (unsigned int i = 0; i < 6; ++i) { // 6 faces of cubemap
		// Render the scene to appropriate framebuffer
		mirror->envmap.render_framebuffer(i);
		renderScene();
	}
	mirror->visible = true;
	// Make sure that render is written to texture before next iteration.
	glTextureBarrier();
	mirror->envmap_ready = true;
}
With that, we can render multiple mirror objects:
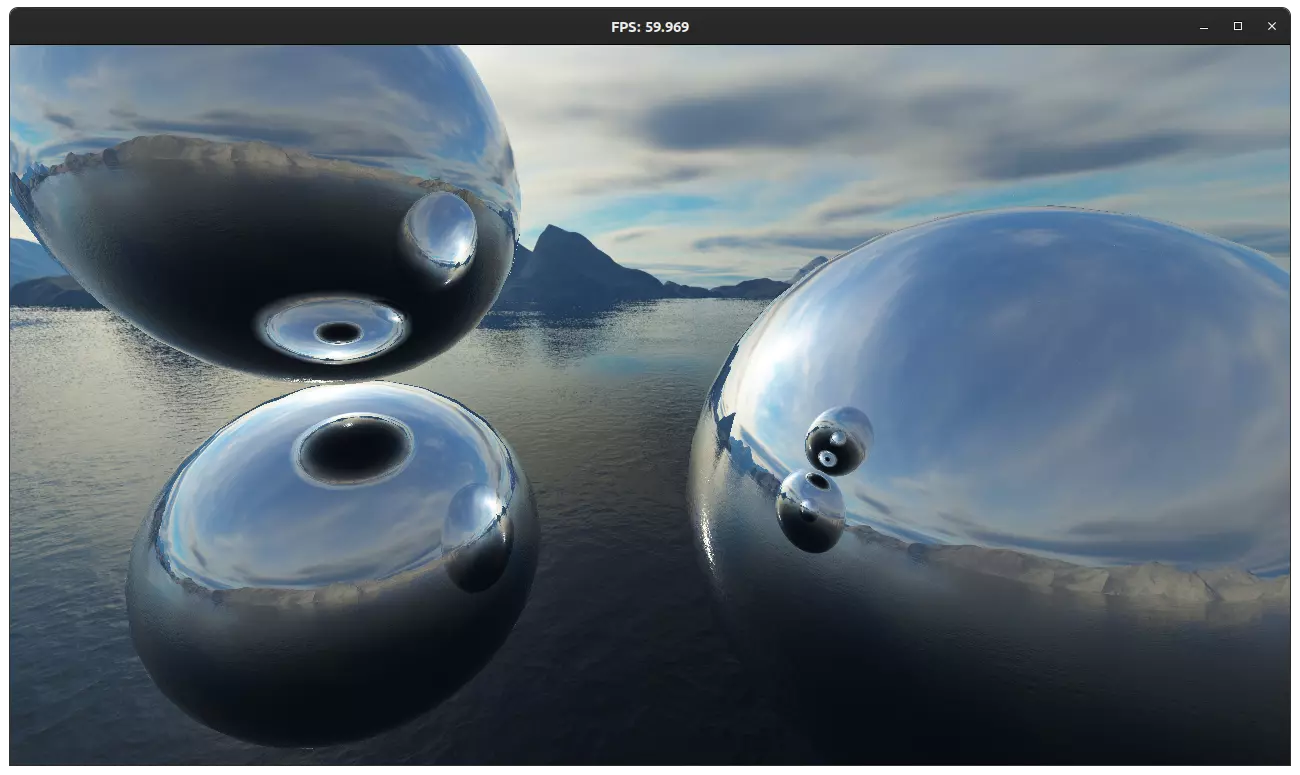
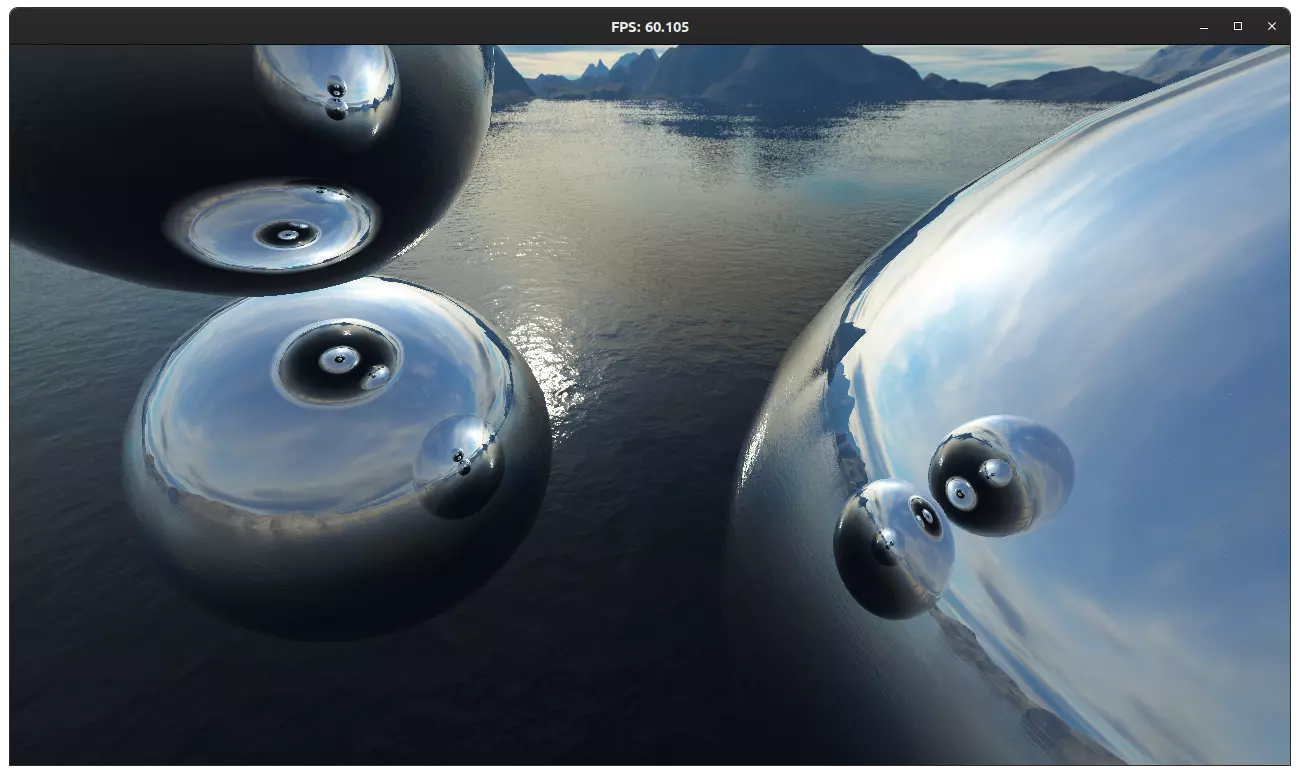
If you pay attention, you can see that reflections on the bottom right sphere are incomplete. In other words, we don’t see the reflection of reflection. To solve this, we can repeat process above multiple times. In the next picture, it’s repeated 3 times:
Performance Benchmark with Multiple Mirrors
Despite 3 mirror objects with 3 environment map computations for each, I’m still getting 60 FPS. My system is:
Intel i7-7700HQ (8) @ 3.800GHzCPU- 16 GB of RAM.
NVIDIA GeForce GTX 1050/PCIe/SSE2with driver version470.74.- Ubuntu 20.04
Each face of each cubemap is 1024 by 1024, except for the skybox, which is 2048 by 2048.
Increasing the number of mirror objects plummets the performance. Here’s an example with 7 mirrors and 3 environment map computations for each, getting ~36 FPS:
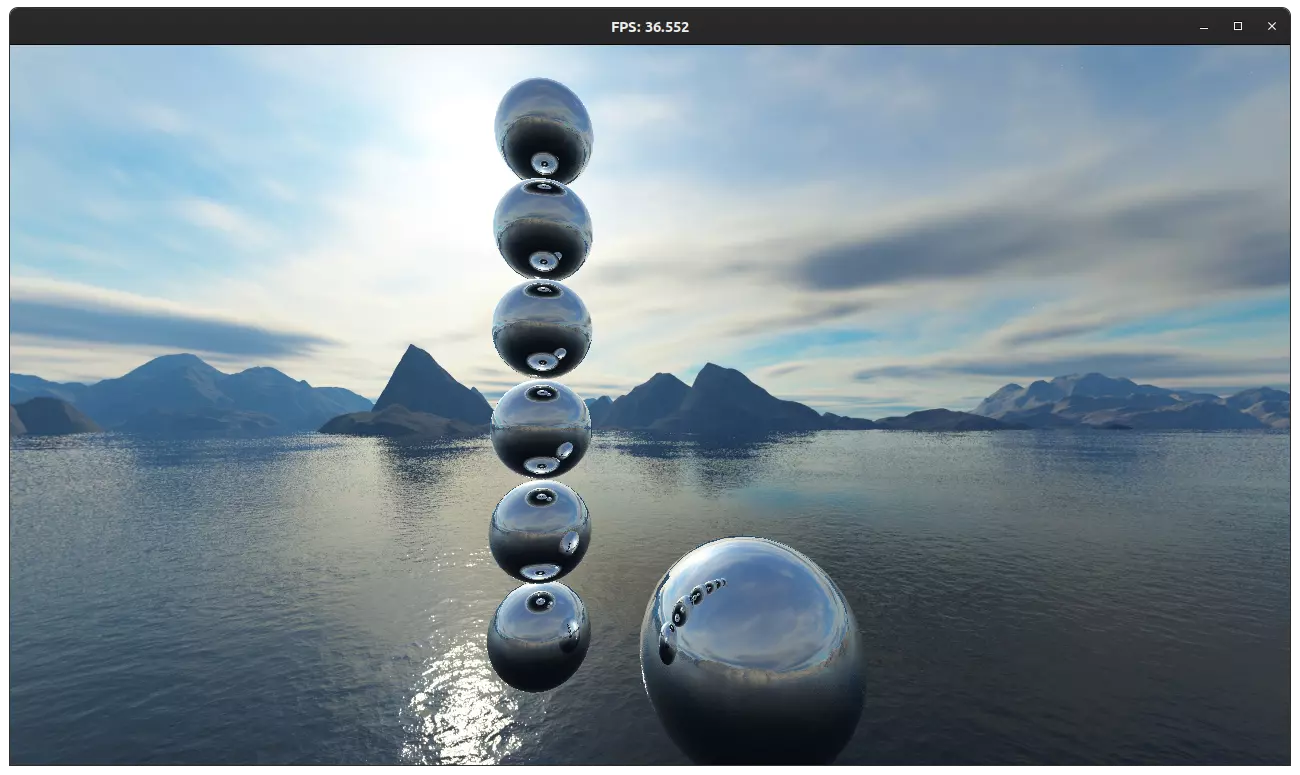
I tried different configurations in the table below. The number of mirror objects, environment map computations for each mirror object, and the average FPS is given in each row. Max FPS is 60 due to v-sync.
| Mirrors | Computations | Average FPS |
|---|---|---|
| 5 | 1 | 60.0 |
| 5 | 2 | 60.0 |
| 5 | 3 | 55.2 |
| 6 | 1 | 60.0 |
| 6 | 2 | 60.0 |
| 6 | 3 | 45.6 |
| 7 | 1 | 60.0 |
| 7 | 2 | 55.1 |
| 7 | 3 | 36.5 |
| 8 | 1 | 59.9 |
| 8 | 2 | 46.7 |
| 8 | 3 | 28.2 |
NOTE: These values cannot be configured at runtime.
You need to modify the program to test these.
Change the starting scene in main.cpp and uncomment the for loop in render_envmaps method definition in rendering.h.
Animation
I integrated the flag from the the previous assignment into this project. I had to make sure that both faces of the flag is rendered correctly. I accomplished this by flipping the normal if a triangle is facing away in flag’s vertex shader.
Furthermore, by exercising my GLSL black magic skills, I created an animated horse.
The model is licensed under public domain and borrowed from this link.
Thanks to twin97 for creating this model and uploading it under CC0 license.
Finally I made both the flag and the horse orbit around the infamous Utah teapot.
I would explain how the animation works if I had time, even work further on it, but unfortunately I’m dangerously close to the deadline now.
Conclusion
I would like to thank the course staff for this enjoyable assignment:
- Kadir Cenk Alpay
- Ahmet Oğuz Akyüz
I learned a lot from this project.